 If you own a camera you are probably going to take photos of the winter wonderland outside.You may be shooting photos of kids playing in the snow, wildlife against the beautiful background of white or amazing landscapes. Regardless of what you're shooting, you'll want your photos to turn out great!
 Here are some tips if you're using a DSLR or any camera that allows you to take creative control of the exposure. First, if you have the option, shoot in RAW. This will give you the best opportunity to correct any exposure problems once you've downloaded the files on your computer.
 Next and most importantly, you'll want to learn how to use the basics of your camera's histogram - a graphic display of the image your camera sees from the darkest to the lightest areas of the image. You can learn more about histograms following one of these links:
Canon - http://www.learn.usa.canon.com/resources/articles/2012/understanding_histograms.shtml
Nikon - http://www.nikonusa.com/en/Learn-And-Explore/Article/fvicbgac/learning-how-to-use-your-camera-s-histogram.html
If you have another make of camera, seach the web for your camera make and the word "histogram" (i.e. "sony histogram", "olympus histogram").
For this article I simply opened a window and took photos of our backyard, not for composition (obviously) just to show how a camera's meter can be fooled and how you compensate to get a great exposure.
For each example I've included the photos plus a copy of the unedited (right out of the camera) histogram so you can compare it to the results.
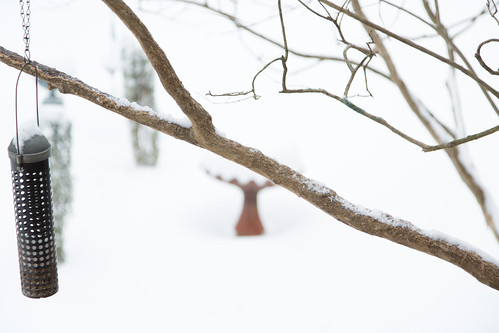
In fully automatic mode, most cameras will be confused by all of the light reflected off the snow and will result in underexposed photos.
Image: 1012
Mode: Fully Automatic
ISO 100
1/200 sec @ f9.0
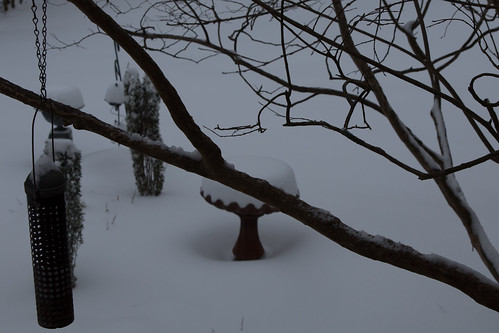
For my taste, this photo is 2 to 2-1/2 stops too dark.

So, what do you do? You have several options, your point and shoot camera may have a mode you can set for photos taken in bright conditions like snow or at the beach. If that's you're only option be sure to use that option. If you are shooting with a DSLR or other camera that gives you the option to switch to Aperture Priority (AV on Canon or A on a Nikon) use this mode but be prepared to make some Exposure Value (EV) adjustments to compensate for the camera meter's confusion about the bright snow by adjusting the exposure compensation to the plus side.
The best option is to switch to full Manual (M) mode and take total control of the exposure using your camera's histogram as your guide instead of relying on the camera's meter. Once you've been shooting in this mode a while you'll soon get a grasp of how to compensate for the light conditions without the need to look at the histogram for each photo. The final images in this article were shot in Manual mode.
But first, here are some examples taken in Aperture Priority mode and the resulting settings selected by the camera's meter plus my manual exposure value (EV) compensation settings.
Image: 1013
Mode: Aperture Priority
ISO 100
1/800 sec @ f/4.0
EV - 0
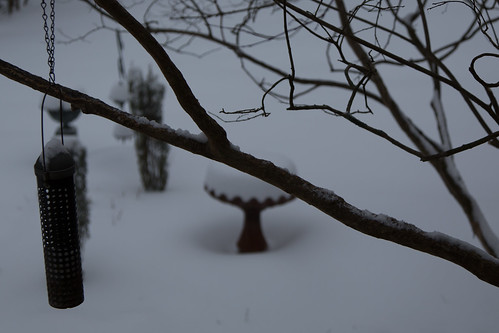

Basically, we're getting the same results as fully automatic,
very dark with little detail in the shadows and little color.
very dark with little detail in the shadows and little color.
Image: 1014
Mode: Aperture Priority
ISO 100
1/400 sec @ f/4.0
EV +1

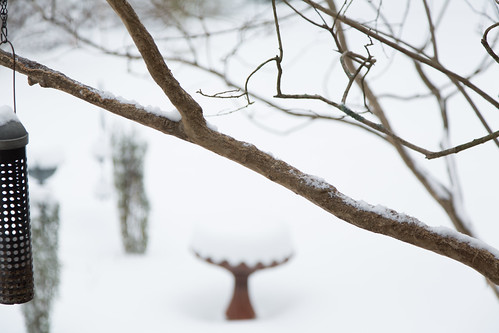
The additional +1 stop of EV certainly improves the exposure,
but the image is dull and we've still lost details in the shadows.
but the image is dull and we've still lost details in the shadows.
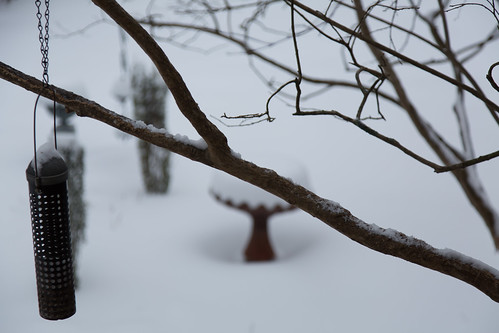
Image: 1015
Mode: Aperture Priority
ISO 100
1/160 sec @ f/4.0
EV - +2

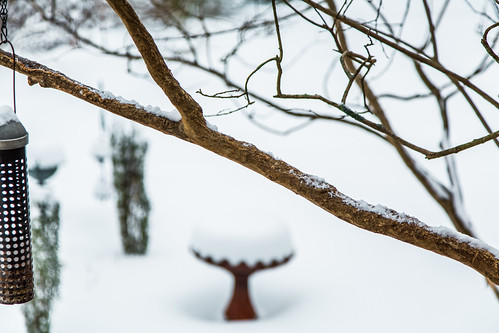
With +2 EV, the histogram is approaching the ideal for this type of photo. Lots of information
toward the right hand side of the graph without going too far and blowing out the highlights
(photo speak for over exposed in the lightest areas of the photo). Also, color and details in the
darker areas and shadows are beginning to appear.
toward the right hand side of the graph without going too far and blowing out the highlights
(photo speak for over exposed in the lightest areas of the photo). Also, color and details in the
darker areas and shadows are beginning to appear.
Image: 1016
Mode: Aperture Priority
ISO 100
1/80 sec @ f/4.0
EV - +3

The histogram on this +3 EV exposure hasn't blown out the highlights but its getting close. Because it is a RAW file, we could probably recover some of the lost details in the brightest areas and we certainly have plenty of information to work with in the dark areas and shadows. Probably somewhere between +2 and +3 would be ideal using Aperture Priority for this image.
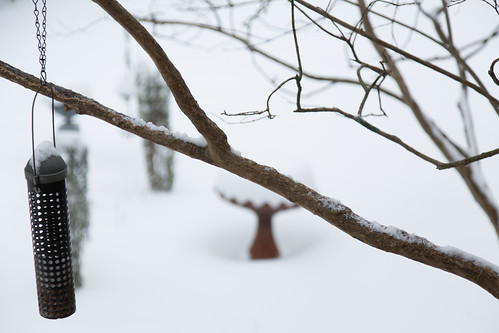
Image: 1018
Mode: Manual
ISO 100
1/125 @ f/4.0
EV - 0
This image was exposed by simply using the histogram on the back of my camera's display.
The goal was to adjust the shutter speed only, keeping the lens at a constant f/4.0 aperture and the ISO at 100 to get the best possible image quality. Adjusting the shutter speed until the histogram was pushed to the right without being pushed all the way which would indicate blown out highlights, I was able to quickly grab this image.
Once the image above was downloaded, I used Lightroom 5.7 to add some "pop" to the image by increasing contrast, clarity, boosting shadows and some fine tuning to the tone curve. I also pushed vibrance and saturation a bit to enhance the colors against the white snow.
The edited version.
So, happy shooting and don't forget to stay warm! Keep your camera cold, your batteries warm and you'll get some great Snowmageddon 2015 shots!